Learning in Adobe Illustrator to how to make a knights shield with a dynamic background is a little lengthy process. However, it all depends on the number of detailing you provide in the illustration.
Use this tutorial to learn how to make a shield and get more knowhow of this software that can be used to make other illustrations.
Step # 1 – Alter the ellipse
To start off, draw an ellipse and from the “convert anchor point” tool make it a pointed edge. Elongate it with the “direct selection” tool.
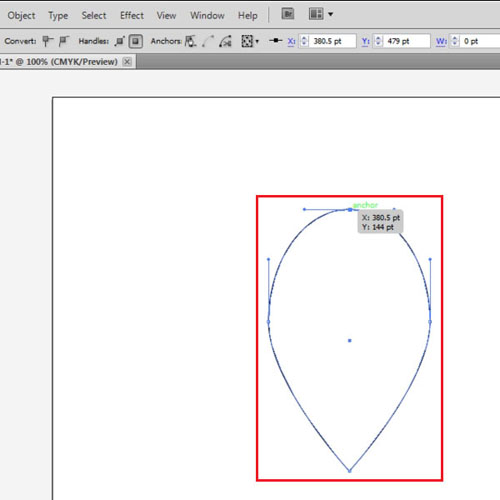
Step # 2 – Delete anchor point
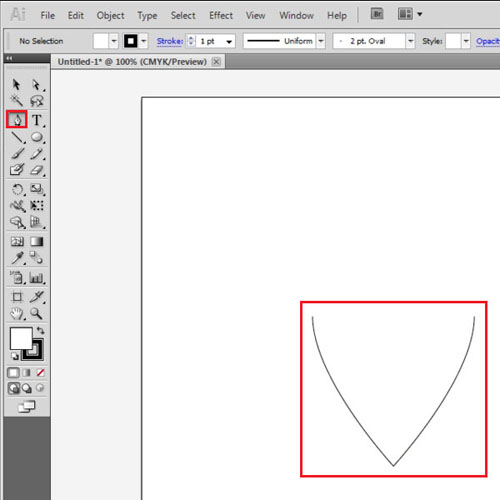
With the same tool selected that is the “direct selection tool”, delete the top anchor point.
Step # 3 – Create the top portion
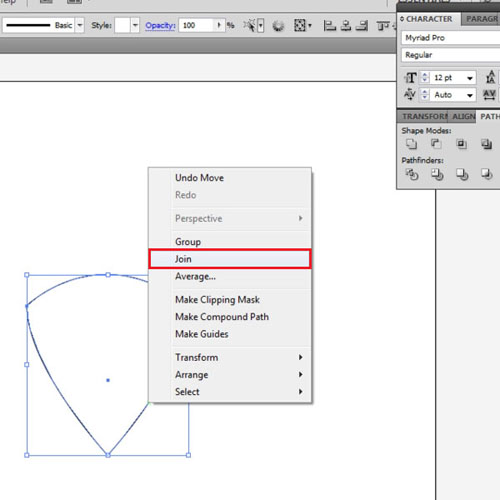
Use the “pen tool” to create a top portion for the shield and place it on top, adjust the anchor points accordingly.
Combine all of the anchor points by selecting all of them, right clicking and pressing the “join” option.
Step # 4 – Add gradient
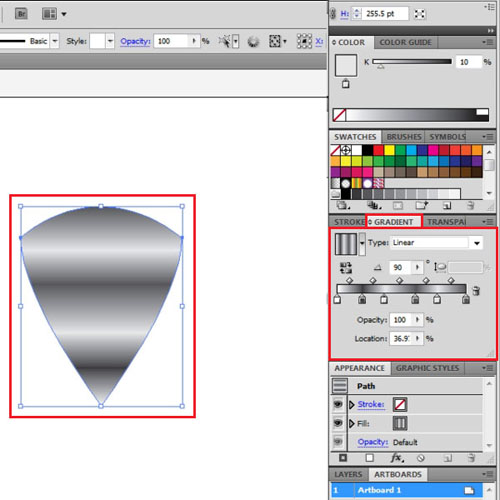
Remove its stroke and add a gradient to it of six color stops alternating between white and dark gray to give a metal effect. Keep its angle at 90 degrees.
Step # 5 – Offset the path
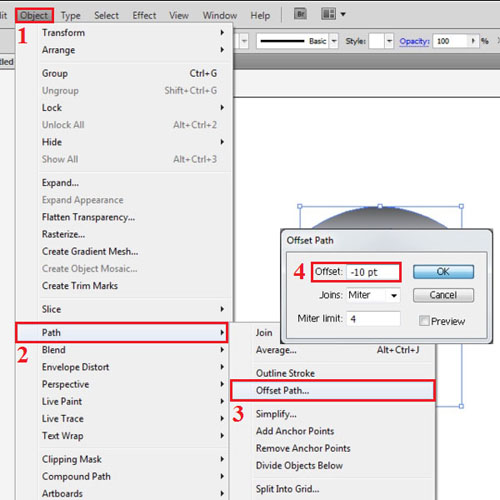
Offset the shape that you have just created by “-10 pt” by going to the “object” menu, dropping down to “path” and selecting “offset path”.
Select the inner portion of the shape you just created and change its gradient angle to “-90” from the panel on the right.
Step # 6 – Further offset the inner portion
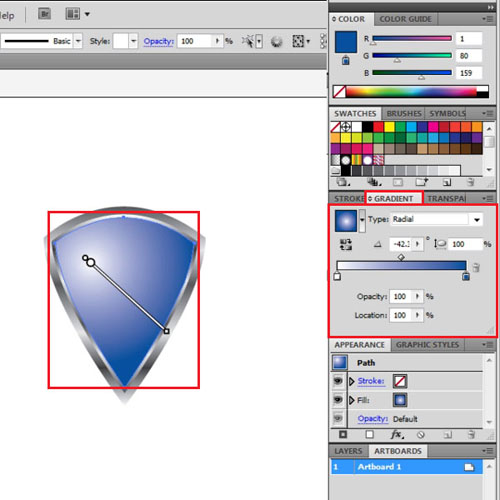
Further offset the inner portion by “-2 pt”, fill it with a white to blue radial gradient and adjust the gradient bar.
Step # 7 – Make the bolt
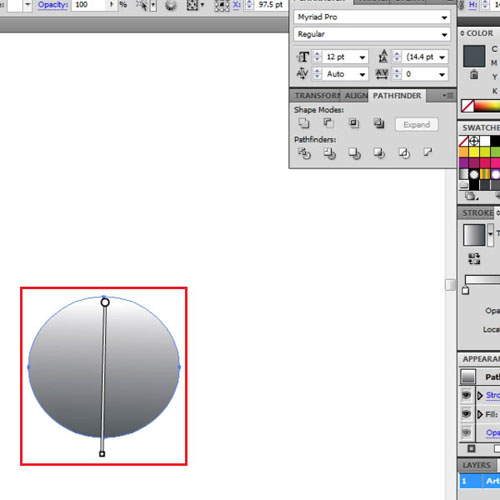
To make the bolts, draw a small ellipse and fill it with a white to gray linear gradient. Adjust its size and place it on the outer portion of the shield. Copy and paste the bolt by pressing “ctrl + c” and “ctrl + v”. Place the copies on the shield accordingly.
Step # 8 – Add the “drop shadow” effect
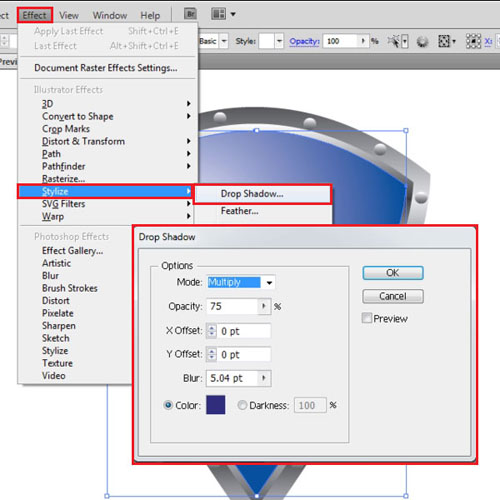
Select the inner portion of the shield, copy it and paste it in front by pressing “ctrl + f”. Go to the “effect” menu, drop down to “stylize” and select the “drop shadow” option. From the menu that appears enter the values as shown.
Step # 9 – Add the “inner glow” effect
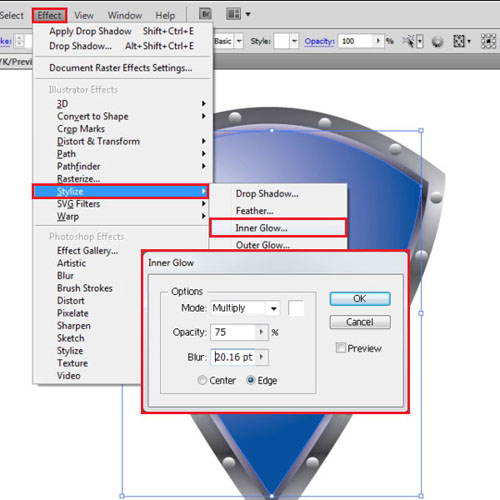
Copy and paste once again, remove the drop shadow effect from it and add another effect by going to the “effect” menu, dropping down to “stylize” and pressing the “inner glow” option. Enter the values as shown. Group all of this and hide it by going to the “object” menu, then going to “hide” and pressing the “selection” option.
Step # 10 – Rotate the line
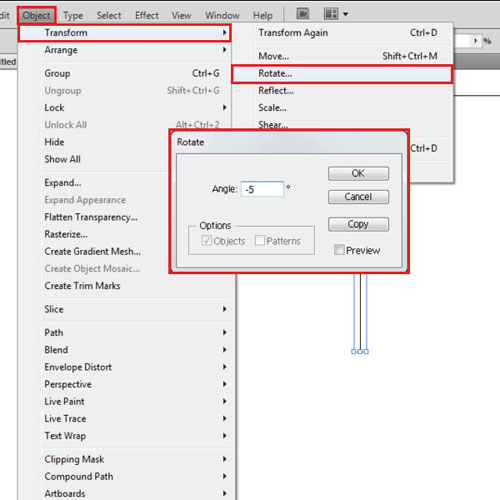
Creating a dynamic background in this software is not that difficult. To understand in Adobe Illustrator how to create a dynamic illustration for the background, go to the “outline” mode from the “view” menu and first draw a straight line. Then go to the “object” menu, drop down to “transform” and select the “rotate” option. Rotate a copy by “-5” and join these two lines.
Step # 11 – Copy the shape
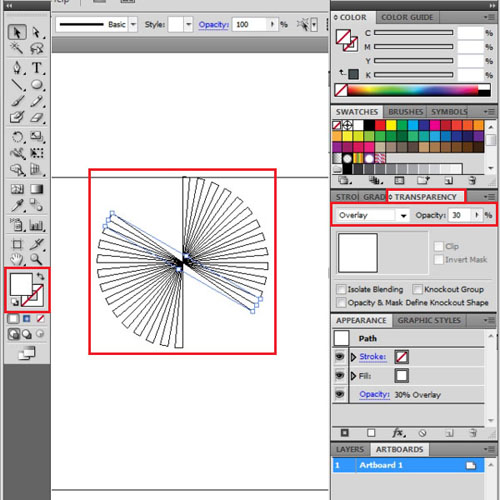
Copy it over with the “pen tool”, delete the original, and keep rotating a copy of this by “-10pt” until you reach the shape as shown.
Add a white fill to it and reduce its opacity to “30%” while putting the blending mode to “overlay”.
Step # 12 – Make a circle and create an opacity mask
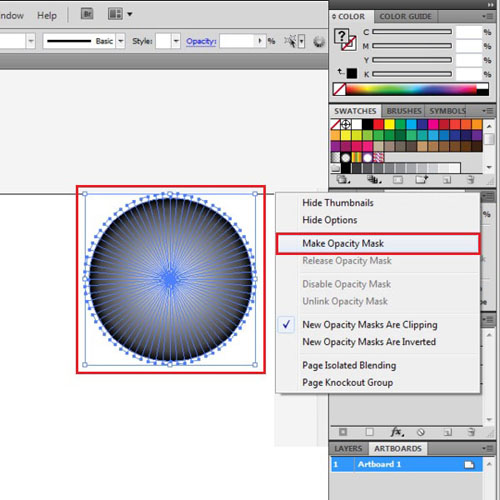
Make a circle originating from its center, smaller than the previous shape, go to the preview mode and add a white to black gradient to it.
From the drop down arrow on the transparency panel make these two shapes into an “opacity mask”.
Step # 13 – Make background
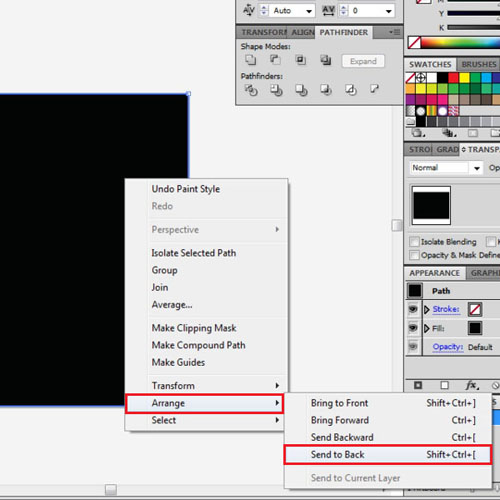
Create the background by drawing a rectangle the size of the canvas and adding a black fill to it. Right clicking on it, drop down to “arrange” and select the “send to back” option to send the background shape behind all other illustrations.
Now go to “object” and select the “show all” option. The shield appears. Adjust the size of the opacity mask and the shield as per your requirement and your knights shield is now ready to be used.
 Home
Home