You can learn about Adobe Illustrator by following different Illustrator tutorials.
In this particular tutorial will teach you how to move flat art onto the perspective grid in. Objects can now be given a 3-dimensional effect by using the Illustrator perspective tool on the perspective grid. This tool allows you to give a whole new perception to your image. To understand this tool further, follow the steps below.
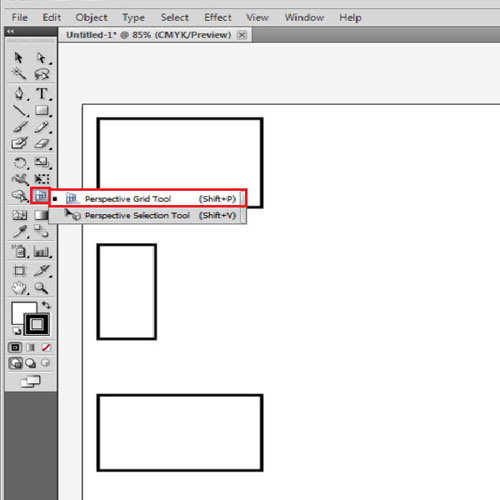
Step # 1 – Select the “perspective grid tool”
The tool panel in Adobe Illustrator cs5 has two perspective options. If you keep pressing the “perspective grid tool”, another option appears. This is known as the “perspective selection tool”. For this second option to work, first select the perspective grid.
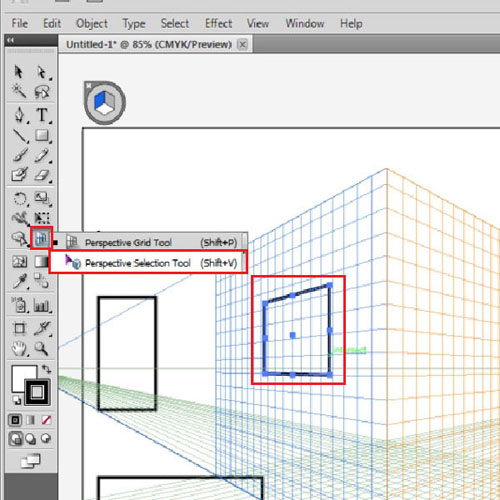
Step # 2 – Drag the object into perspective
For doing this choose the “perspective selection tool”. On the current page you have flat objects and a 3-dimensional grid. To convert these objects and to bring them in perspective, select them with this tool. Drag the illustrations wherever you want o on the page. As you select them with the “perspective selection tool”, they will automatically come in perspective. Moving any shape around now will move it in perspective.
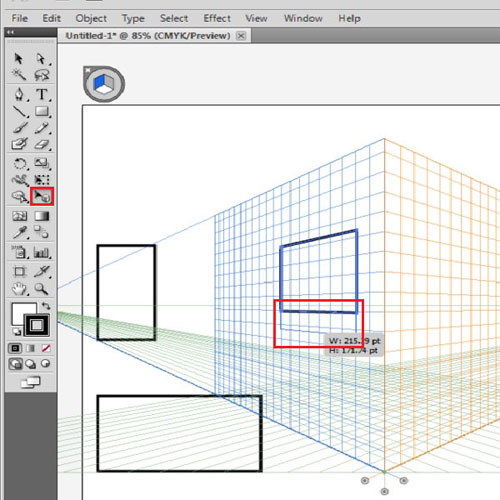
Step # 3 – Alter the shape
This tool also allows you to expand or contract your shape. Use the handles on the border of the shapes, to drag and increase its size.
Step # 4 – Define the grid
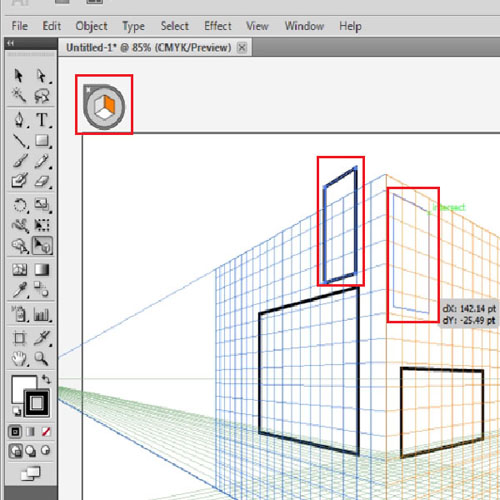
An essential thing to know while bringing these objects in to perspective is, to how to define which grid you want them to stick to. Right now, these two shapes are stuck to the “left grid”. This is because this grid was selected on the “widget” that appears after you choose the Illustrator perspective tool. If you change the grid from here, then whichever flat object you move now will get snapped to the right grid.
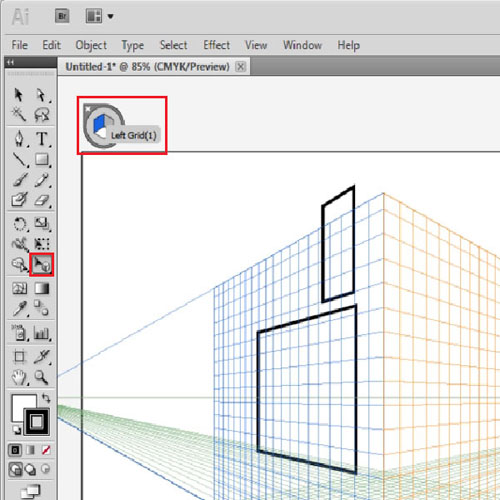
Step # 5 – Move the object to another grid
You can also move an object from one grid to another. For example, if you want to move this rectangle from the left grid to the right one, then keep selecting it and press the keyboard shortcut for selecting the right grid, which is “3”. The shape automatically shifts its grid. You can now move it in perspective according to your requirement.
Step # 6 – Add perspective to the text
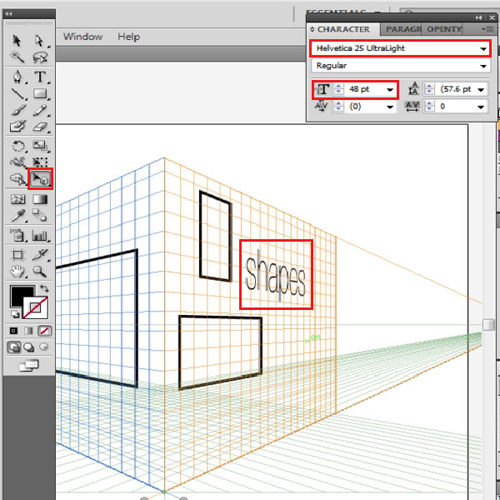
Text can also be brought in to perspective the same way. To do this, select the text box and enter your text. Press “ctrl + t” to open the text panel. From here you can choose the font type and size. Now choose the “perspective selection tool” and drag the text. It will automatically snap to the grid you have selected. Even after it snaps to the grid you can still edit it.
Use this and other Illustrator tutorials to learn more about this software and its tools.
 Home
Home