In this tutorial you are going to learn how to set office 2013 as default allowing you to use your new suite of Office programs as often as possible.
Step # 1 – Opening Default Programs
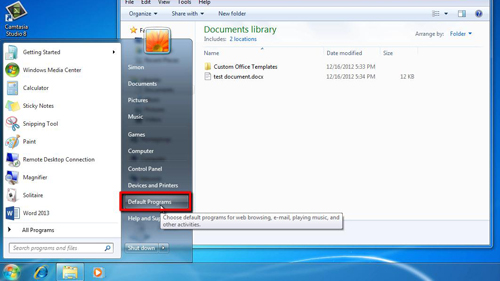
As you can see we have a “.docx” file here and when we open it WordPad is the program that opens by default. To associate this file type with Word 2013 you need to click on “Start” then click “Default Programs”.
Step # 2 – Locating the File Type
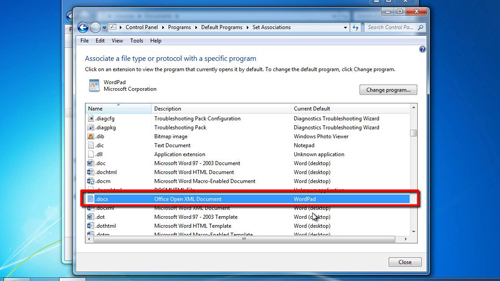
The “Default Programs” window will appear, from the list of options you need to click, “Associate a file type or protocol with a program”. The computer will load a list of file types and you need to locate and click on “.docx” in the list – as you can see the file type is associate with WordPad.
Step # 3 – Changing the Default Program
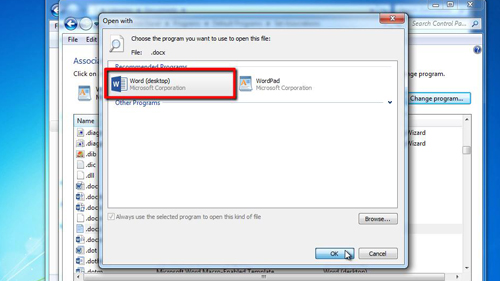
Click on the “Change program…” button and the “Open with” window will appear. Select “Word” and click “OK”. Close the open windows and navigate back to where the document is located. You can see that the icon has changed indicating that it will now open with Word – when we click on the file we can see this is the case. This process can be repeated for all the file types that can be associated with Office 2013 and that is how to set office 2013 as default.