In this tutorial, we will teach you how to use markers in Premiere Pro.
For this tutorial, we will be working on a footage that has three different shots within a single clip. Now what if you want to identify the exact frame where the shot changes. This is where markers come in handy. They act as visual reference points which can help you organize a long source clip.
Step 1 – Adding a marker
The free stock footage used for this tutorial can be downloaded at the following link:
You can import the video in your project panel and let’s get started.
You can hit the “L” key to move forward in the timeline. Remember, if you press the L key multiple times, the clip will speed up.
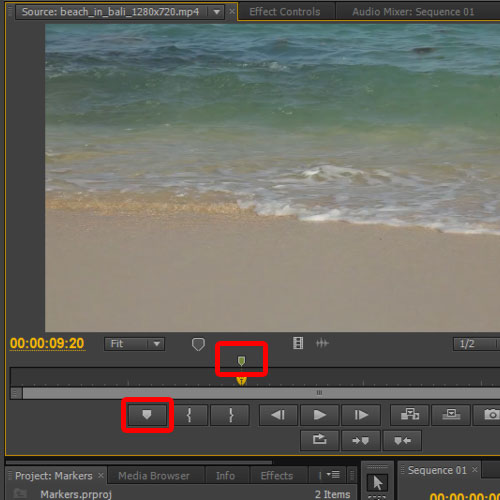
Once you land on the exact frame where the shot changes, you can add markers in Premiere. For that, click on the “Add marker” button highlighted in the image below. This will add a marker on this exact frame. Once you do that, notice that the green marker appears on the top of the slider.
Step 2 – Configuring the Marker
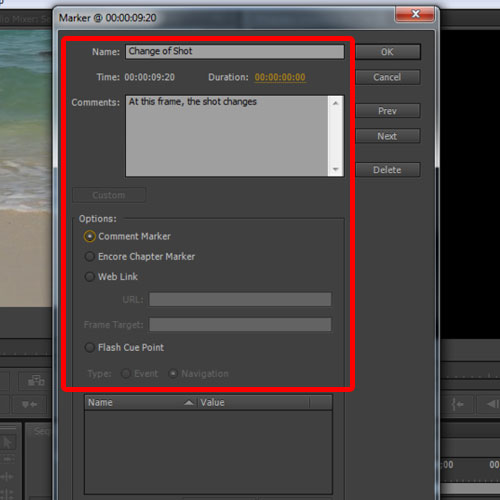
If we double click on it, a new window will open up where we can configure the marker settings. For example, you can name and add a description about this marker.
If you want to integrate with other adobe products, you can use the options below. By default, the comment marker option is already selected. You can choose the Encore Chapter Marker when outputting to a DVD or enable the Web Link option, which would support certain formats like QuickTime. When playing the clip, at this particular time it will launch the URL that you have included in the field. Furthermore, you can even choose the Flash Cue Point option which will mark it as a cue point when the composition is exported to flash. We can also determine the type of cue point, either an event cue point or a navigation cue point. An event cue point is one which you don’t want to show on the navigation controls while the navigation cue point is accessible in the video player. For now, we will simply choose the comment marker option and click on the Okay button.
Moving forward, we will make another marker using the same steps and name it “Change of Shot 2”.
Step 3 – Marker name and description
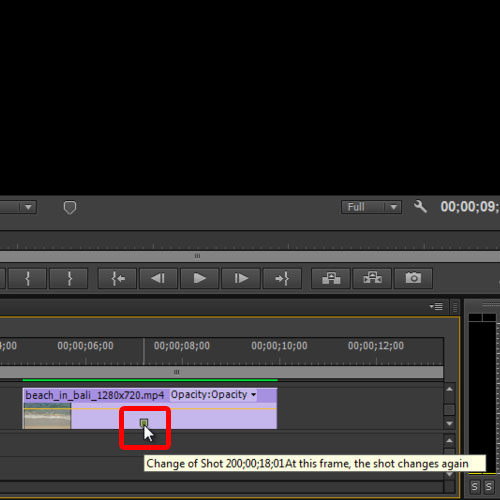
In the previous step, we added a name and description in the marker. Whatever you add in the description will show up in the tooltip window once you hover over the marker, like shown in the image below. So it’s always a good idea to stay organized by using these small tools in Adobe Premiere.
Step 4 – Moving through each marker
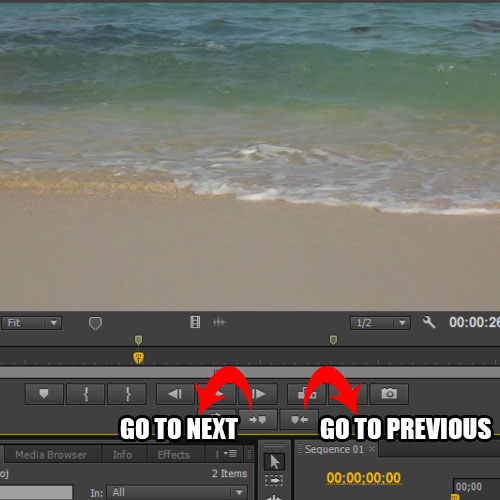
We can use the navigation buttons, highlighted in the image below, to move from one marker to another. So if you click on the “Go to Previous Marker” button, you will notice that the timeline seek bar is automatically moved to the previous marker. The same would be done if you click on the “Go to Next Marker” button.
Step 5 – Marking footage in the clip
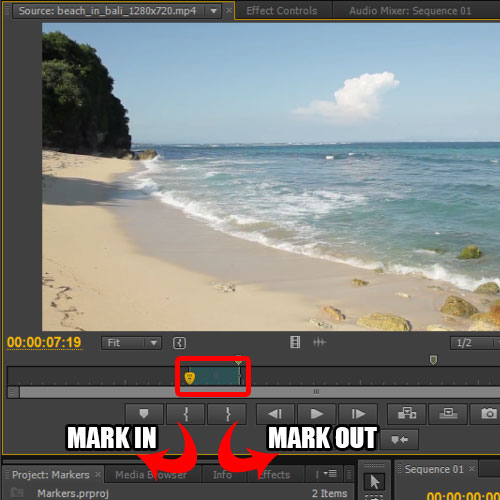
If you click on the Mark Out button, this will mark the ending point of the clip. Now if you move the seek bar a bit and click on the Mark In button, you can see that the area between the mark in and mark out points is green.
Step 6 – Inserting the marked clip
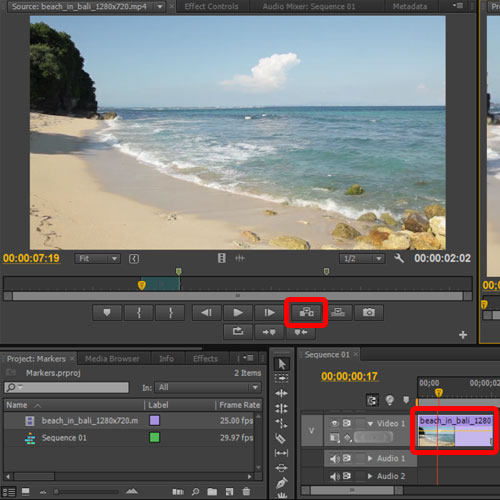
Now if we click on the Insert button, notice that only the portion between the mark in and out points is brought to the timeline in the sequence. So instead of bringing the whole source clip to the timeline and clipping each segment manually, this is a much faster way of bringing content from the source clip to the timeline.
Step 7 – Another way to insert the video
The insert button can also be used to add footage between a clip in the sequence.
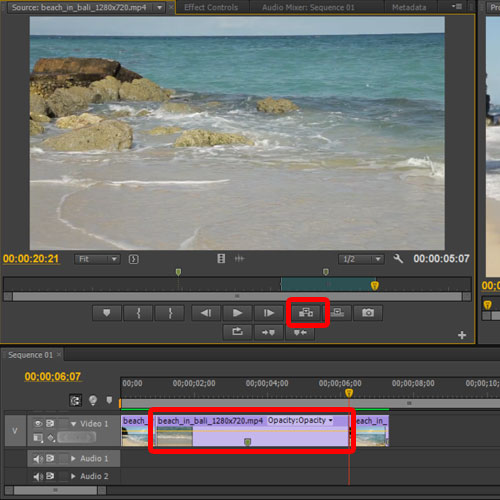
If you place the seek bar in the middle of the clip in the timeline and then click on the insert button, you will notice that the selected footage cuts the video in the timeline at the exact frame where the seek bar was positioned, and the selected footage is placed in between the cut.
If you preview the result, you will notice that the clip is only placed between the two clips and doesn’t overlap any of the original footage.
Step 8 – Overwriting footage in the timeline
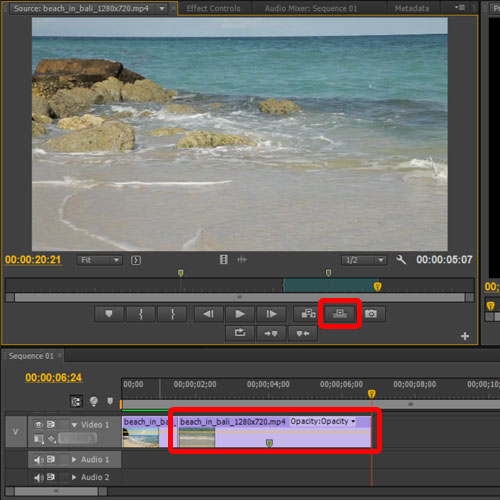
What if we had clicked on the Overwrite button? If you import footage to the timeline using this button, the selected clip will overlap the remaining footage in the timeline.
So the first option is good if you want to add a clip between the footage and the other is used to replace the remaining part of the footage that you don’t need in the timeline.
Step 9 – Difference in the Markers
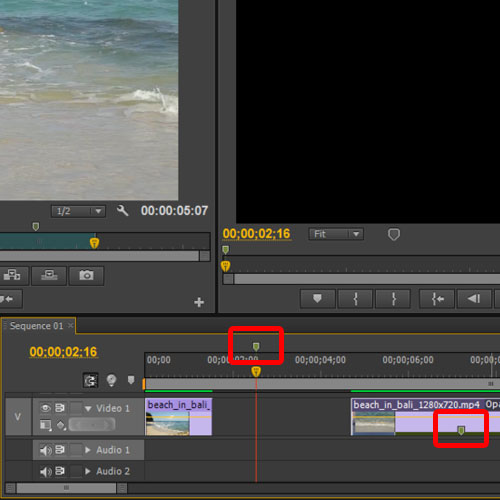
Markers can also be added in the timeline and they act a bit differently than the ones in the source monitor.
You can add a marker in the timeline by simply pressing the M key. You can even add details related to the marker just like we did previously in the tutorial. But here’s where the difference lies.
If we move a clip on the timeline, you will notice that the marker that we had added in the clip through the source monitor is also moving according to the clip. On the other hand, the marker that we added in the timeline stays exactly where it was added.
That’s because the markers added in the source monitor reference the clip they were added in while the markers added in the sequence reference the timeline they were added in. And that’s the fundamental difference between the two.
Step 10 – Delete a Marker
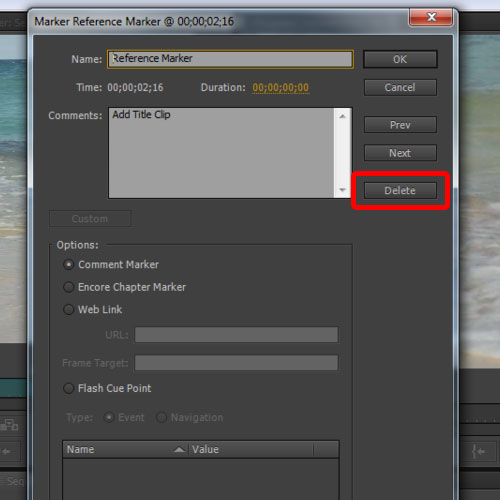
To delete markers in Premiere, all you have to do is double click on the marker icon and once the new window opens up, click on the delete button. With that done, the marker will be removed.
Step 11 – The Loop option
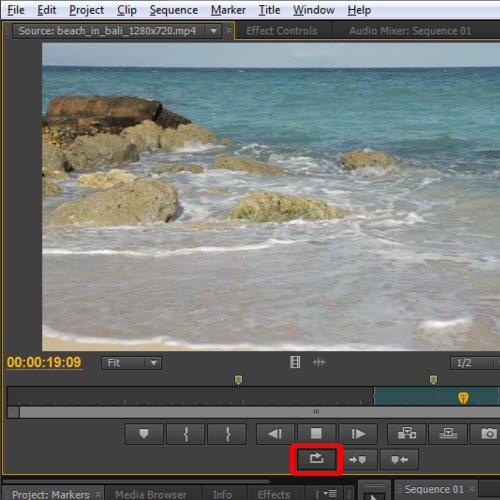
Moving back to the source panel, the loop option allows you to play the selection in a loop. This allows you to closely monitor the selected footage and make your creative choices, composing the timeline accordingly.
And these are some of the ways you can use markers in Premiere.
 Home
Home