In this tutorial, we will guide you on how to use the Lens flare effect in Adobe Premiere.
Lens flare is basically the reflection of the light which is scattered by passing through different sources of light, when the camera is diagonally angled against Hard Light. It is generally produced by shooting against the sun or high voltage halogen bulbs.
With that said, you can also digitally create the effect in your clip using Adobe Premiere. For the purpose of this tutorial, we will be using a sunset stock video clip.
Step 1 – Lens Flare Effect
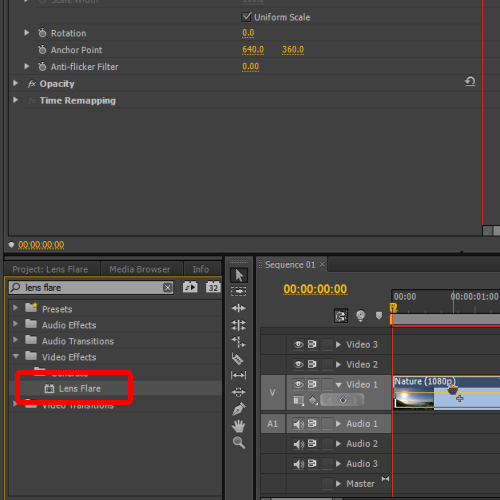
So to get started, move to the Effects tab and type “lens flare” in the search box. From the search results, simply drag and drop that effect to the video layer.

Step 2 – Positioning the Lens flare on light source
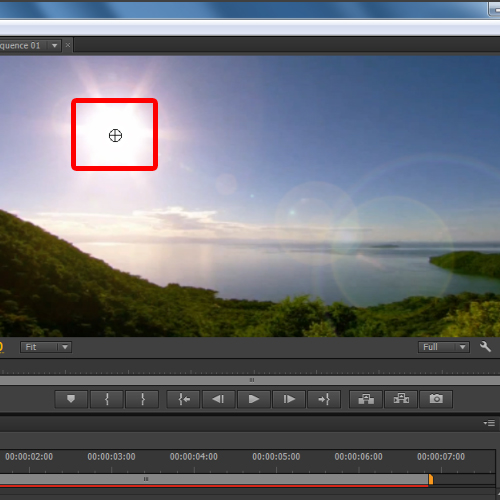
Notice now that the clip will show a static lens flare effect. To configure it, move to the effect control panel and click on the Lens flare option.
Now you can drag the effect on the screen and place it on the actual source of light. Over here, we will place it on the sun towards the top left side of the screen.

Step 3 – Adjusting the lens brightness
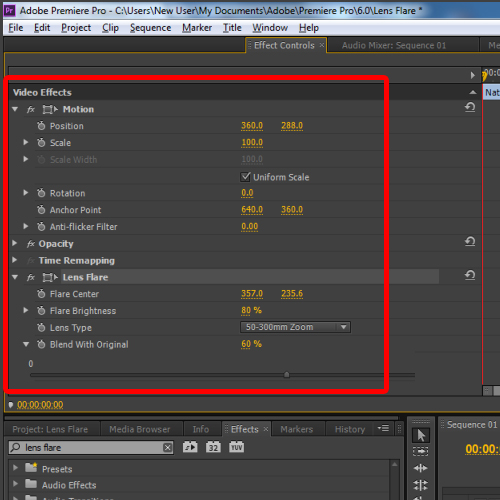
The Flare Brightness option over here lets you configure how much light is to be produced. For this particular scene, we will input 80 for the value. You can adjust the value according to the clip you are working with.
With that done, click on the drop down menu next to Lens type and make sure the 50-300mm zoom option is selected. This is the most widely used option but you can also switch it to 35mm prime or 105mm prime depending on the focal length of the lenses used while shooting.
Next, we will configure the “blend with original” option to 60 percent. This will soften up the flare effect a bit.

Step 4 – Animating the lens flare effect
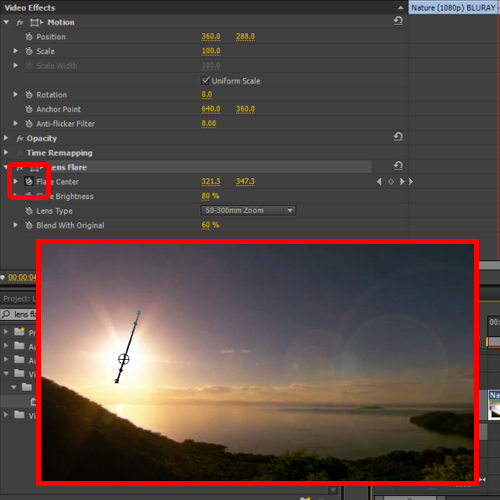
If you preview the video now, you will see that the effect it is not animated and instead stays in the same place. We want the flare to move together with the original source light.
Therefore, move to the Flare Center and click on the toggle animation option. Here we will animate the effect only on the y-axis since the sun is setting. So move at the end of the sequence, and drag the effect downwards on the original source of light.
Now if you move backwards in the timeline, you can see that the effect has been automatically animated on the y-axis.
Now you can render the sequence and preview the results. The animated lens flare effect is now ready..

 Home
Home