The images that you work on in Adobe Illustrator need to be vector art. This allows you to edit that design, object or any drawing in this software. Creating vector images in Illustrator can be tricky and complex at times.
To learn how to create a vector illustration in Adobe Illustrator follow the steps given below.
Step # 1 – Make a rounded rectangle
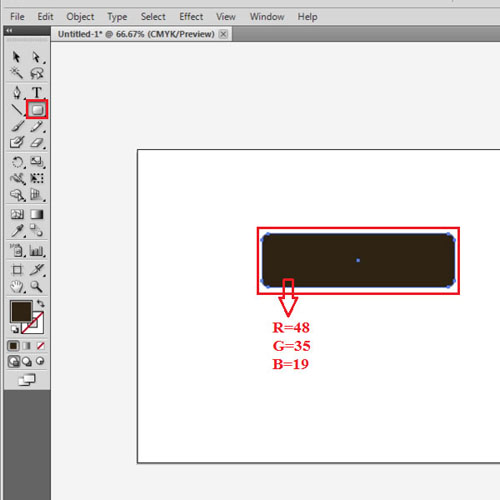
Choose the shape tool and make a rounded rectangle. This will make a part of the cake body. Change its color to brown with R=48, G=35, B=19.
Step # 2 – Make a curved edge
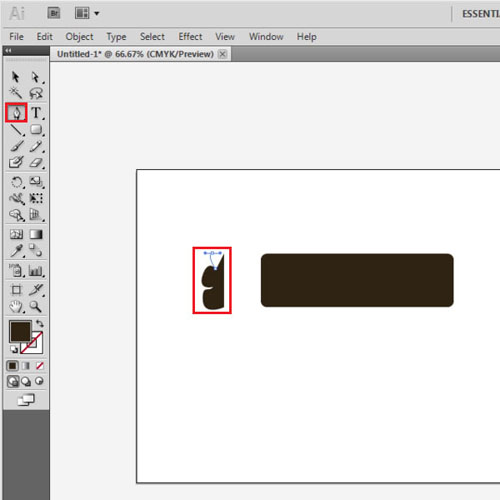
Now, with the pen tool make a curved edge for this part of the body. Copy this portion by selecting it and pressing “ctrl + c”. Paste it with “ctrl + v”. Change its side and place this part on the other corner.
Step # 3 – Make the cake topping
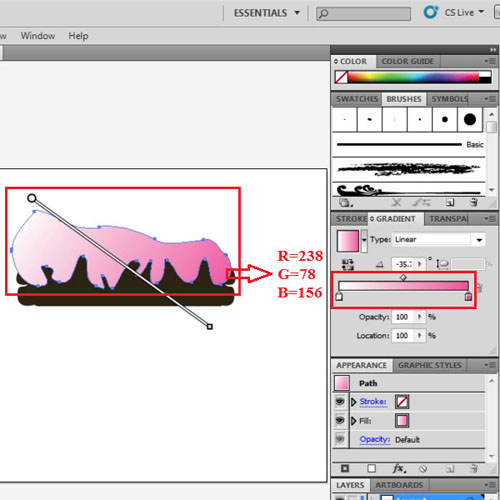
Next draw the topping of the cake. Do this by drawing an irregular shape as shown from the pen tool. Select it and add gradient to it. The gradient is currently in grayscale. Change the gradient slider on the left side to RGB with R=238, G=78, B=156. Shift the gradient bar diagonally.
Step # 4 – Make a copy of the topping
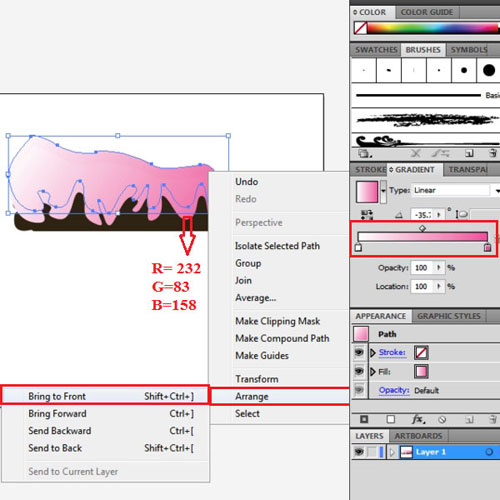
Select this shape, press “alt” and drag it. This copies the illustration. Bring the original topping image to the front by right clicking, going to “arrange”, and selecting “bring to front”. Make the gradient of the copied illustration at the back a little darker than the one in front with the value R= 232, G=83 and B=158.
Step # 5 – Make the complete body of the cake
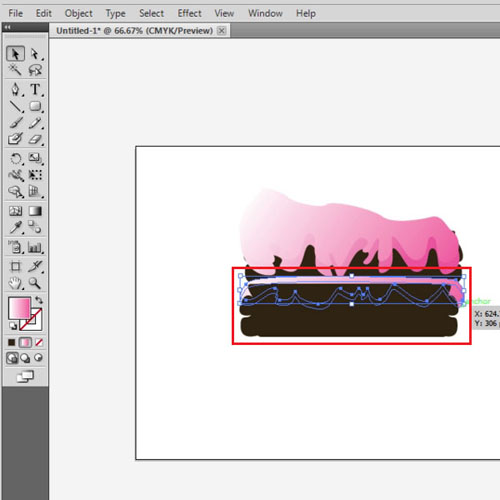
To add another layer of this pink topping in the middle, make an irregular shape. Over here, this object has already been made. Copy and paste it by pressing “ctrl + c” then “ctrl + v”. Notice both the top portion of the middle topping and its underneath shadow has been made here like as that in the previous one.
Now select the brown portion of the cake, copy and paste it to create the lower portion of the body.
Bring the middle icing of the cake in front of the brown portion by as you brought the earlier object to the front. Do this by clicking right on the icing, going to “arrange” from the menu and selecting the “bring to front” option.
Step # 6 – Make the plate
Once done with this, make a plate underneath the cake. Do this through the ellipse shape tool. Make two ellipses to create the upper and lower portion of the plate. Fill it with color as per your wish.
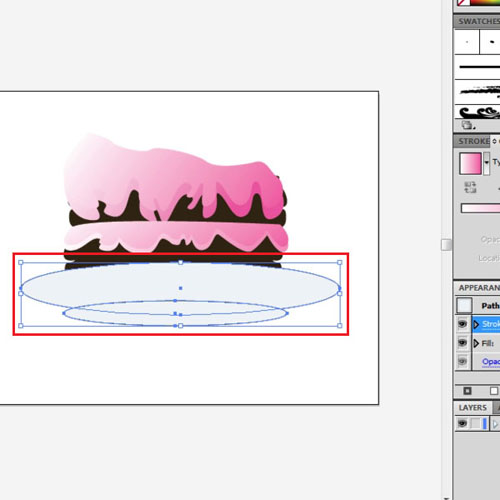
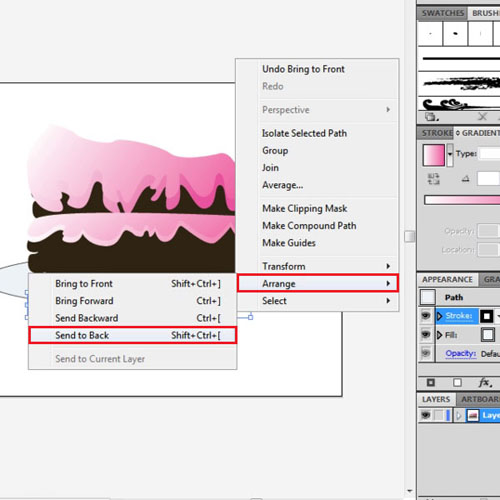
Step # 7 – Send the plate at the back
Send the plate at the back by selecting both parts right clicking, going to “arrange” and pressing “send to back”. Send the lower portion of the plate at the back through the same method.
Step # 8 – Create the depth of the plate
For an illustration to be complete you need to make the shadows of the images that you are creating. First create a darker portion inside the plate to signify its depth. For this, make a smaller ellipse. Keep its color black, reduce the opacity to 12% and choose the “multiply” option.
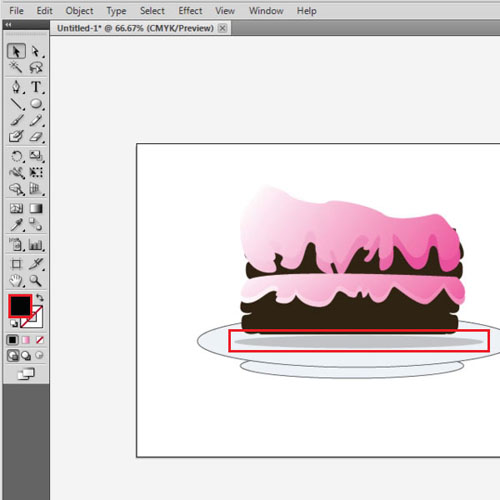
Step # 9 – Create the shadow of the cake
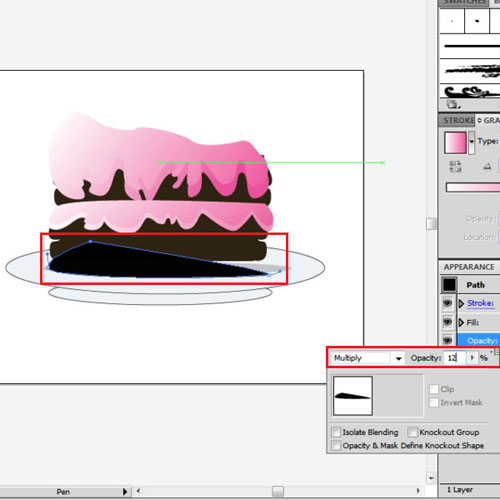
For creating the shadow of the cake piece, make a custom shape using the pen tool with black color fill inside it. Apply the same options i.e. choose “multiply” and reduce the opacity to 12%. Adjust the shape so that its direction is the same as the cake piece.
Step # 10 – Make the shadows of the plate
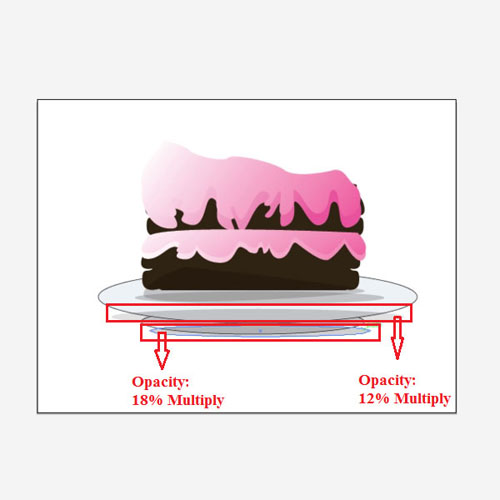
Next make shadows for both portions of the plate. Apply the same options to them. However, the shadow for the bottom portion of the plate will be a little darker as it is closer to the ground. Hence, keep its opacity at 18%.
Step # 11 – Send the shadows to the back
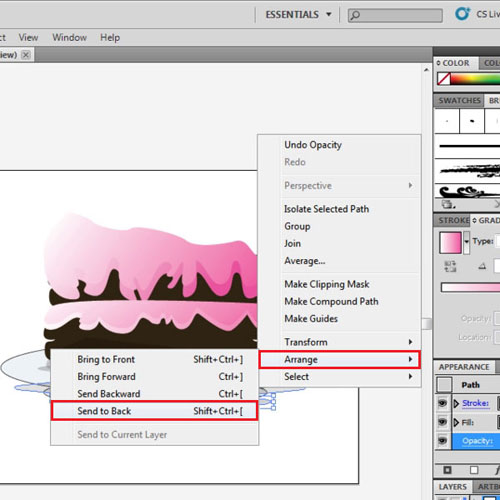
As the cake piece needs to be the illustration in the front, select the plates and the shadows together and send them all at the back. Now only select the shadow of the upper portion of the plate. Move it at the back as right now it is coming in front of the lower portion of the plate.
Step # 12 – Change the background color
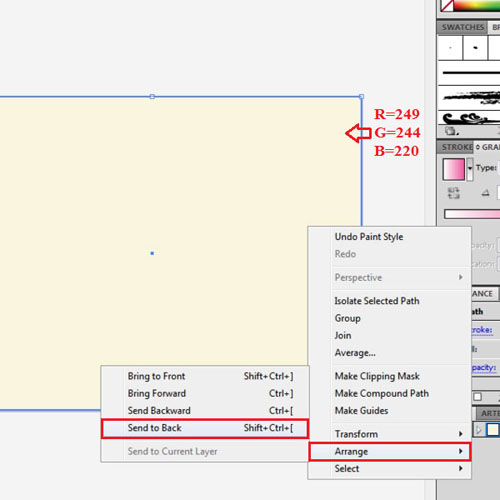
Lastly, to change the background color, select the shape tool and make a rectangle equal to the page. Change its color to light yellow with R=249, G=244 and B=220. Move this rectangle to the back to bring the cake piece illustration in the front.
 Home
Home