Photoshop is one of the most commonly used picture manipulation applications nowadays. It offers thousands of editing tools and image effects. However many people are not aware of the full capability of its functions. For this purpose, Photoshop tutorials are introduced which are the best way to learn different techniques and methods of image editing. In this tutorial we will guide you to learn how to create a wrinkle effect in Photoshop. You can also learn other methods to give effects to your photos through our other sequential tutorials.
Step # 1 – Go to the File Menu
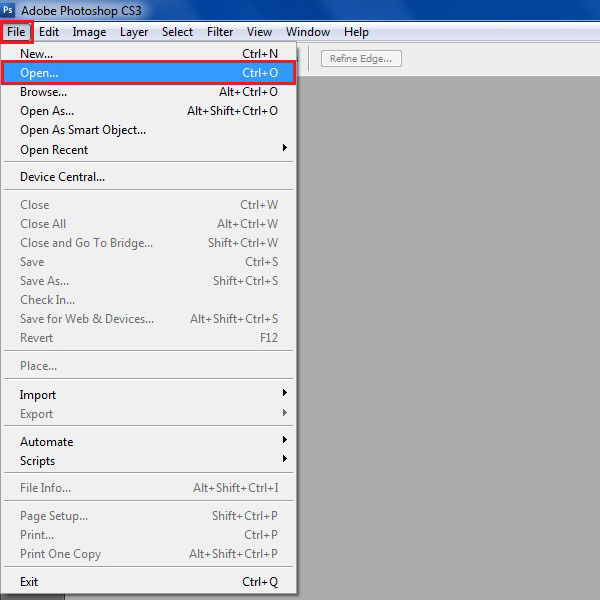
First of all open Adobe Photoshop and go to the “File” menu which is located at the top left corner of the screen. Click on it and select the “Open” option from the menu.
Step # 2 – Open an Image
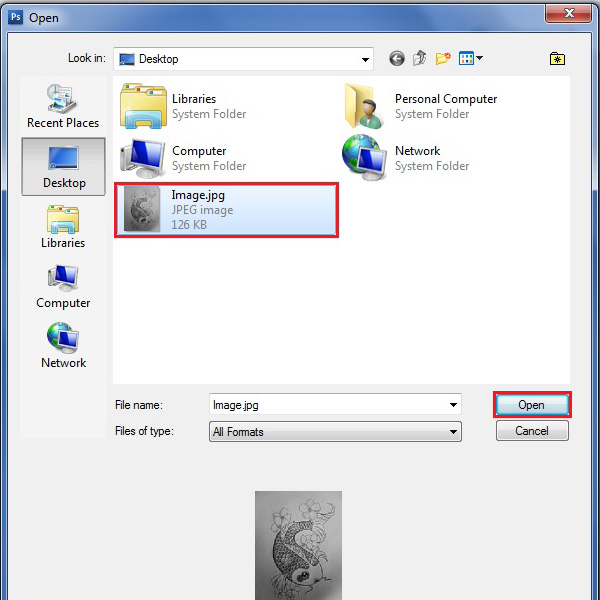
A new browsing window will open in front of your screen. Select the image on which you want to create a wrinkle effect and click on the “Open” button to load it on the Photoshop work area.
Step # 3 – Apply a Gradient Tool
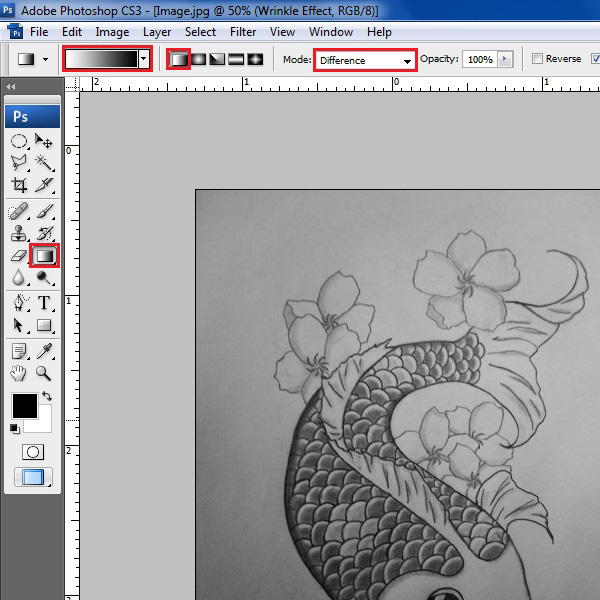
Insert a new layer by clicking on the “Create a new layer” button which is located on the bottom right corner of the window and rename it to “Wrinkle Effect”. Now select the “Gradient” tool from the menu and click on the “Pattern” option to set a “white to black” gradient from left to right side.
Once done, click on the “Linear Gradient” option which is available next to it and select the “Difference” mode from the drop down menu.
Step # 4 – Choose an Emboss Filter
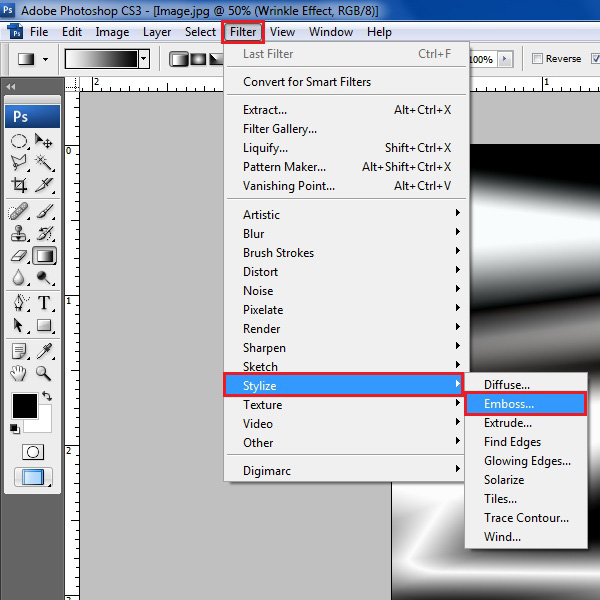
Now click and drag random lines on the image to create a wrinkle gradient pattern. Once the lines are drawn, move over to the “Filter” menu and select the “Stylize” option from the list. Now click on the “Emboss” filter.
Step # 5 – Choose its Settings
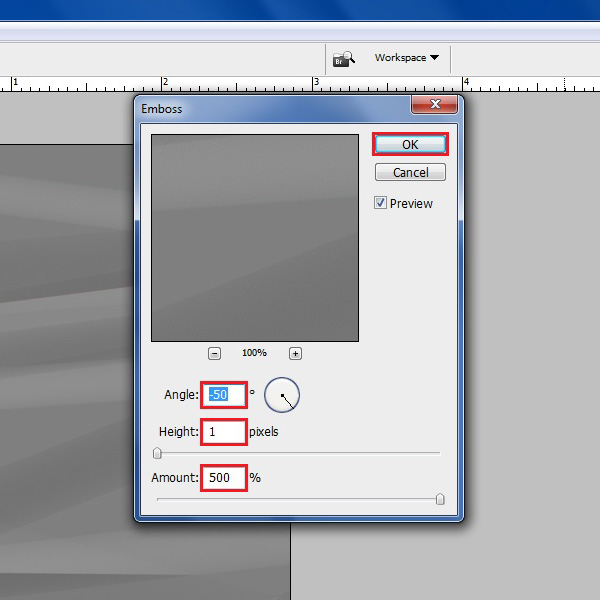
A new window will open in front of your screen which is labeled as the “Emboss”. In this window, choose the angle to “-50°”, filter’s height to “1 pixel” and amount to “500 %”. Now click on the “OK” button to apply these settings on the gradient pattern.
Step # 6 – Open the Brightness / Contrast Panel
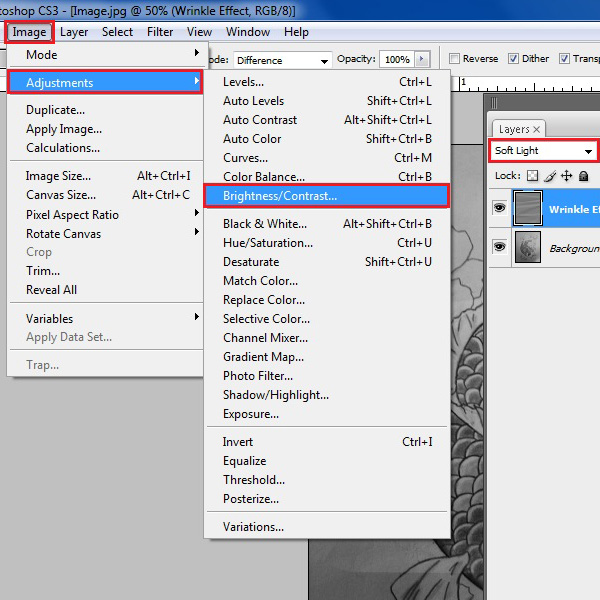
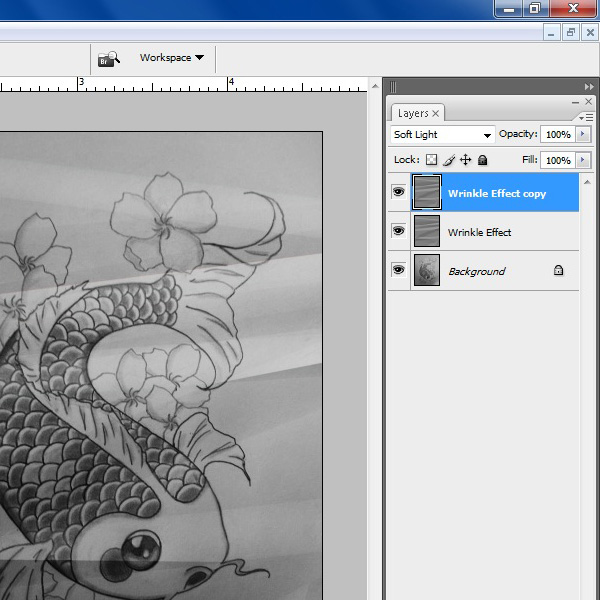
Now click on the Blending option which is available on top of the layers panel. Choose the blending mode of this layer to “Soft Light”. Once the blending is applied, go to the “Image” menu and select the “Adjustments” option. Now open the “Brightness/Contrast” panel by clicking on its name from the list.
Step # 7 – Choose Contrast Settings
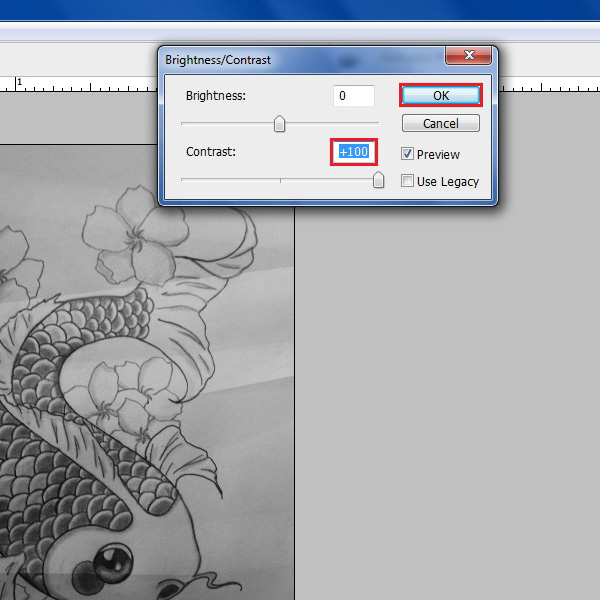
In the “Brightness / Contrast” window, increase the “Contrast” option to “100%” and click on the “OK” button to apply these settings on the layer.
Step # 8 – Duplicate the Layer
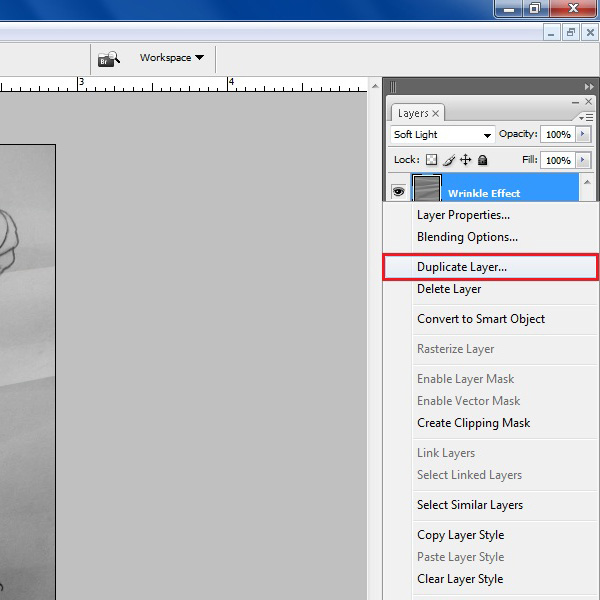
Now right click on the “Wrinkle Effect” layer and select the “Duplicate Layer” option from the menu to make a copy of this layer. This will make the wrinkle effect more prominent and will make it appearstrongly on the image.
Step # 9 – Final Image
Once all steps are followed successfully, the final image should look the sample image given below in the screenshot.
 Home
Home