In this tutorial, we will guide you on how to create a vignette effect in Adobe Premiere.
In a vignette effect, the borders of the frame have a reduced saturation or even brightness as compared to the center of the frame. With this effect, you can easily draw the attention of the viewer to the center of the frame. It is one of the adobe premiere effects that help add depth to the video. For this tutorial, we will be using special filters to add this creative effect to the clip.
Step 1 – Black Video
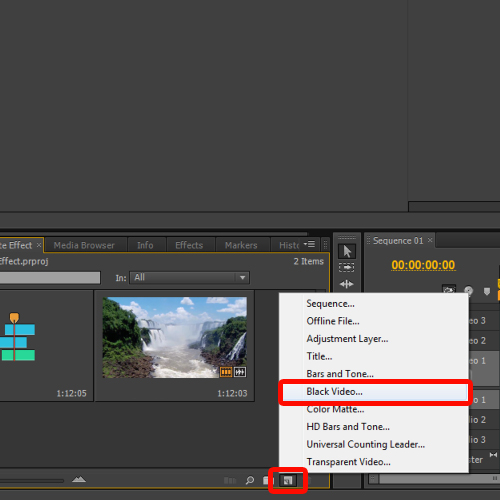
So to get started with the vignette effect, first we will click on the new bin icon, in the media library, and click on the “Black Video” option from the menu.

Step 2 – Black Frame Video Settings
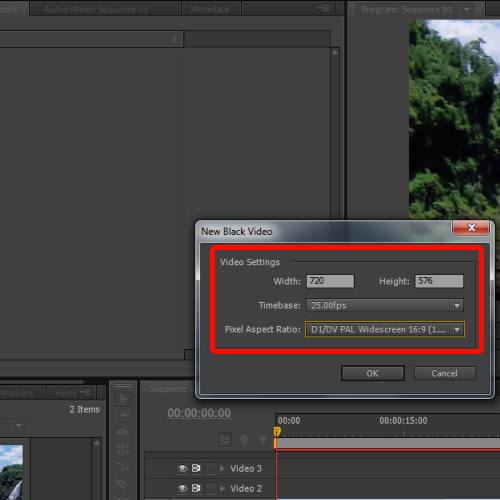
With that done, a dialog box will appear on the screen. Over here, you have to configure the same settings according the video you are working on. You have to choose the same aspect ratio, frames per second along with the same width and height. For this tutorial, we will keep the default settings as it is, and move on with the process.

Step 3 – Bring the frame on the timeline
Once done, you will notice a black frame appearing in the media library section over here. Just drag and drop the frame to the Overlay layer over here and let’s stretch it to the same length as the original video.

Step 4 – Adding the circle effect to the Black Video frame
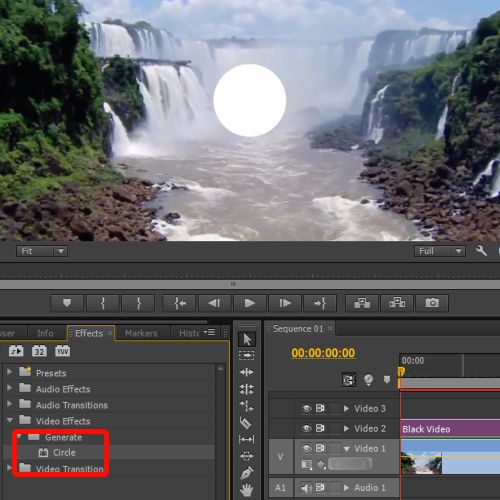
Now you will have to open up the Effects tab in the media library. With that done, search for the circle effect. From the results, simply apply the Circle effect on the overlay layer by simply dragging it to the black video frame layer.

Step 5 – Configuring the Circle Effect
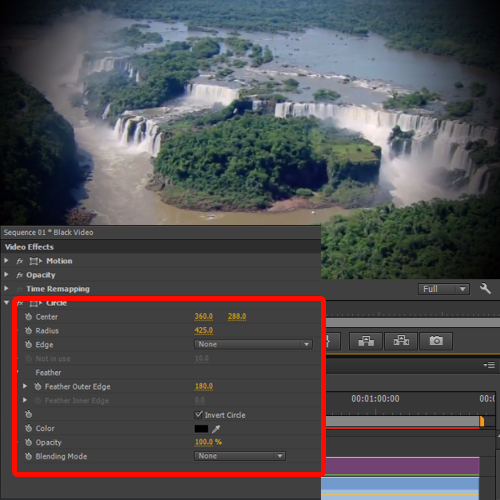
Once done, go to the effect control panel on top of the media library section and replace the color with pure black. Next, make sure that the “Invert Circle” option is ticked. After that, you will have to increase the radius to 425. You can choose a radius according to your footage.
With that done, expand the Feather option and increase it to 180. This will make the edges of the circle soft and will blend in with the background. It is important to play around with the options a bit to see what looks better on the footage you are working with.
You can see a preview of the output we have made in the screenshot below. Using basic adobe premiere effects and filters we have created a vignette effect on this clip.

 Home
Home