No matter how cool a photo looks but unless you don’t have that perfect caption for that image, it looks quite empty. Once you have made a compilation of images in windows live movie maker, the next thing you would want to do is add caption to each of those images in the project. With certain features in the application you can easily add text to your windows live movie maker project.
In this tutorial you will learn how to add and format captions in a clip in Windows Live Movie Maker.
Step # 1 – Caption the first clip
First of all open your project in which you want to insert the caption.
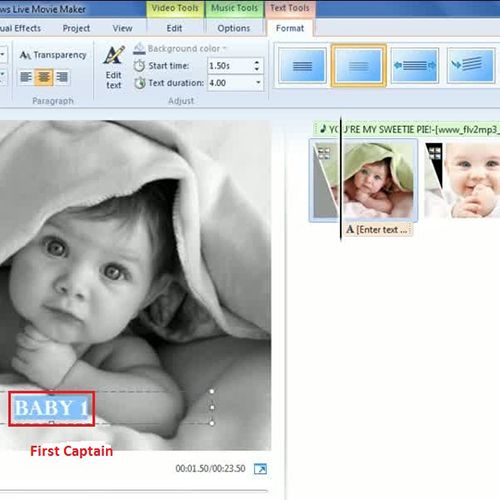
You can start with a completely new project or carry on with an existing one. Once the image is imported in the project, it will start playing automatically in the preview pane. Now, to add text in the movie maker project, simply select the clip you want to add a caption to. Once you have clicked, a box will appear on the video area with a title ‘Type your text’. So type whatever caption you want to give to that picture.
After you have typed the caption you can change the size, format or style of the text through ‘Text tools’ option in the format tab above.
Step # 2 – Insert caption in other pictures
Similarly you can insert caption, and even subtitles in movie maker, in the remaining pictures and so on. Simply click on the second picture and type the caption in the space given.

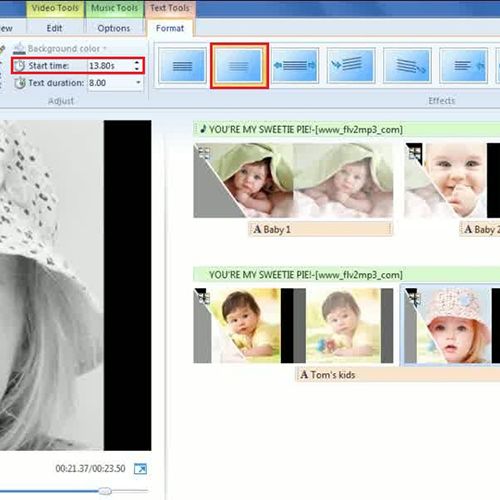
Step # 3 – Same caption for two pictures
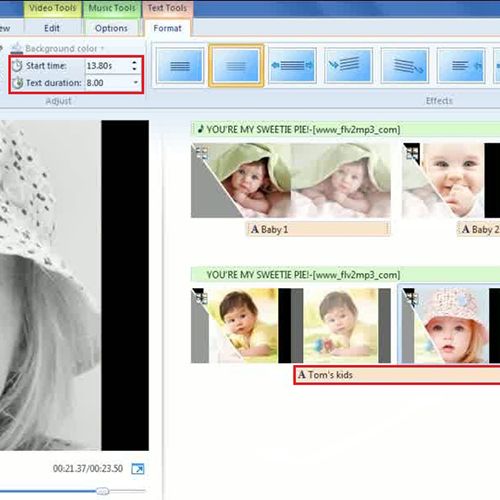
You might want to use the same caption for two pictures. To do so, first give a caption to the picture. Then adjust the timings for the duration of the caption to play in the video through ‘adjust’ section in the main ribbon. Suppose the time set for the text to be played on a picture was previously set for 4 seconds and now you have increased it to 8 seconds. In this way it will play for a longer time covering both the clips.
Step # 4 – Start time and effects
You can also change the starting time of a text so that it can play a little later in the video for a particular picture. Let’s say you have changed the starting time from 11 to 13 seconds so the text will start playing after 13 seconds of the video.
Another interesting option is of ‘Effects’ located in the main tab. Hover over each effect to get the preview of how each of the subtitles in your movie maker project is displayed.