A Drupal core is updated using the update manager which is accessed by the function update.php. It is always recommended to create a backup of the previous core, so that it becomes easy to revert in case of a corrupted site. Before updating the core, the site should be put into maintenance mode in order to avoid technical issues later on. So,in this tutorial we will learn how to update Drupal Core.
Step 1 – Download latest Drupal Core
Download the latest version of the Drupal core from the internet. It will be downloaded in the .zip format. Extract the contents of the file in a folder so that it can be easily located later on.

Step 2 – Maintenance Page
Before any updation done to our site we have to put our site into maintenance mode
For that,we have to click on “configurations ” tab in the main menu bar.
Then Scroll down the page and click “Maintenance”.
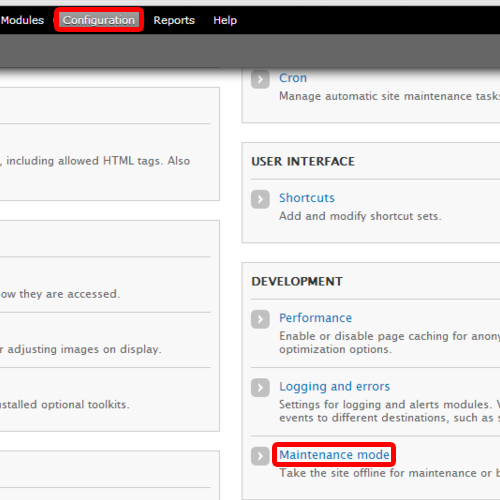
Step 3- Mainetenance Mode
From the next window, choose maintenance mode and click on “Save Configuration”.

Step 4 – Delete old Drupal instance and copy new core
Now we have to add the downloaded folder of druplal to the existing drupal instance.
But before that, we have to remove all the existing drupal folders, except the ‘Site ’ folder
After removing them completely, we have to paste the contents of downloaded Drupal Folder in the same directory where current installation folders and files exists.
But make sure, not to copy the ‘site’ folder.

Step 5 – Run update.php to get results
After that we have to login into our administrative account and run the device manager by typing the following link in the browser:
www.yourdrupalsitename.com/update.php.
The function update.php will update the core.
After that we have to put our site again in online mode, so on the page, Click Go Online.
The image below shows the updated core version and the link to make the site Online again.

And that is how we can update the drupal core.